Developer Setup Guide
These instructions will help you get set up to make your own changes to the PyChOpMarg source code and see the effects of those changes immediately.
It is generally advisable to work within a virtual environment when installing and/or developing a non-standard package, such as PyChOpMarg. And these instructions will guide you down that path. This will protect your existing system Python installation from any incompatibilities between it and PyChOpMarg and/or its dependencies.
GitHub Repo. Forking/Cloning
In order to propagate any changes you make to the PyChOpMarg source code back into the main repository from which the official Python package is built, you must:
Create your fork of the PyChOpMarg repo. under your own GitHub account.
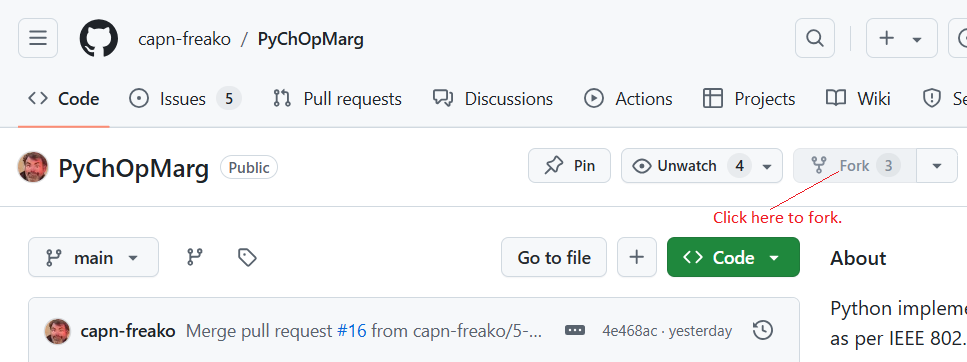
Using your favorite browser, visit the [PyChOpMarg GitHub site](https://github.com/capn-freako/PyChOpMarg).
Create your own fork of the PyChOpMarg repo., by clicking on the Fork button:
Clone your new fork to your preferred local development machine.
Copy the link to your new fork:
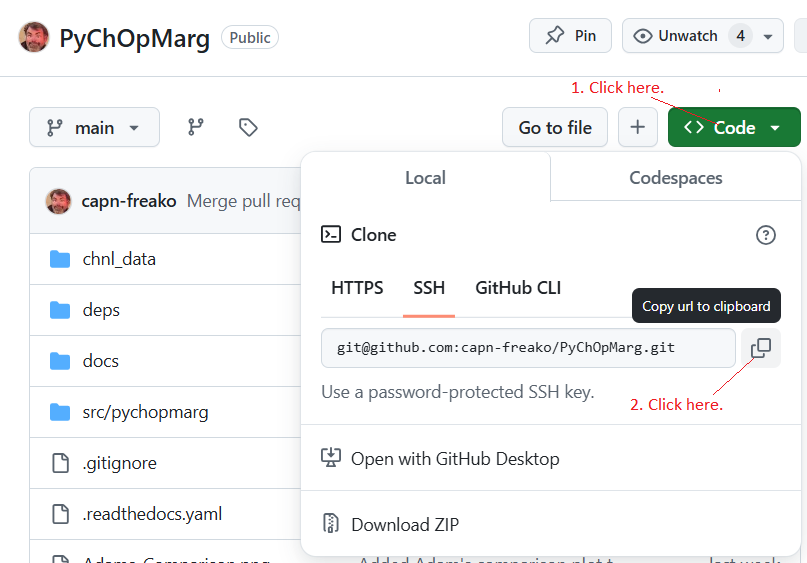
Move into the desired parent directory for your PyChOpMarg folder.
Execute the following command at an appropriate command/shell prompt:
git clone <Paste><RETURN>
Installation
To install PyChOpMarg into a dedicated new virtual environment for development purposes, execute these commands from an appropriate shell prompt:
python3 -m venv ~/.venv/pychopmarg-devThis command creates the new dedicated Python virtual environment.
I’ve assumed that you keep your Python virtual environments in the
.venv/sub-directory of your home directory. If that’s not the case then you’ll need to modify the command slightly, to accommodate your system layout and usage habbits.
source ~/.venv/pychopmarg-dev/bin/activateThis command activates the new virtual environment, so we can install packages into it.
Windows users should use the command:
. ~/.venv/pychopmarg-dev/Scripts/activateYou’ll know that you have correctly activated your new virtual environment when you see the text “(pychopmarg-dev)” appear above your prompt.
pushd PyChOpMarg/Moving into the
PyChOpMarg/directory is necessary, before executing the next command.
pip install -e .This command installs PyChOpMarg and its dependencies into your new virtual environment.
While the dependencies are installed in the usual manner, PyChOpMarg is installed in “editable” mode. This means that changes you make to the PyChOpMarg source code will have an immediate effect.
Using the command:
pip install <module>, install the following <module>s:setuptoolstox
Develop & Test
Make your desired changes to the PyChOpMarg source code.
Make sure to lint, flake, and type check your new code.
The provided makefile can be used for all of this.
Execute: make, to see a list of available targets, along with descriptions.
Contributing Your Improvements
In order to contribute your improvements to the main PyChOpMarg repository for inclusion in the next release, do the following:
Commit your code changes to your local repo.
git commitPush your new commit up to your fork on GitHub.
git push
Visit your fork on GitHub, using your favorite browser, and you will be offered the opportunity to create a Pull Request back to the main repo. By creating such a request, you are asking that your improvements be added to the main repo. and included in the next release. The development team will review your request and either:
accept it unmodified,
request that you make certain changes, or
realize that you are a numbskull and ask you to go away and never bother us again.